Crafting Depth and Dimension with a 3D Layered Butterfly Cardstock Design
There is something quietly satisfying about holding a piece of paper that looks almost alive. A 3D layered butterfly made from cardstock is exactly that kind of project. It brings together the precision of cutting and the softness of paper to create something that feels sculptural, yet delicate. Whether you have been crafting for years or are just looking for a fresh idea to try on a quiet weekend, this type of design offers more than just a pretty result. It opens up possibilities for how you can use paper in ways that go beyond flat surfaces.
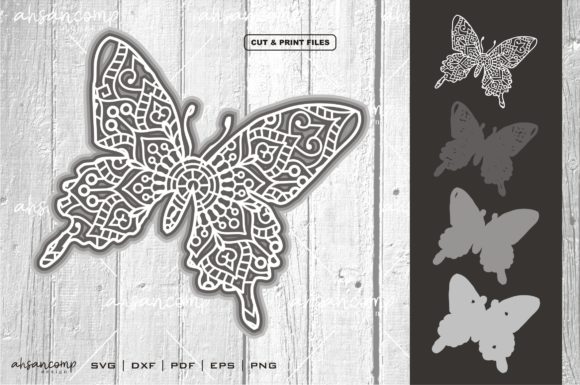
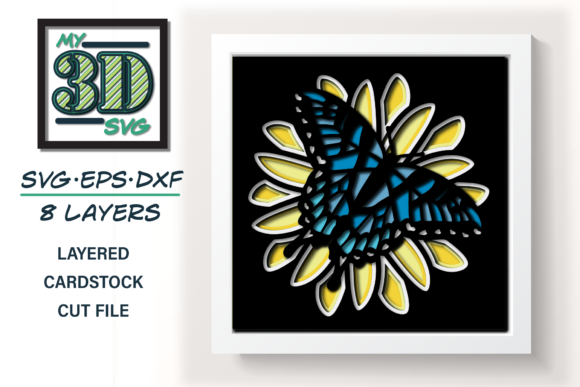
At its core, a 3D layered butterfly cardstock piece is built by stacking multiple cutouts of the same butterfly shape, each slightly different in size or detail, and then layering them with foam adhesive or spacers. The result is a design that casts subtle shadows and shifts as the light changes. It is simple in concept but rich in effect. And that effect is what draws people in, whether they are making a card, decorating a wall, or packaging a product.
Why a Layered Butterfly Design Fits So Many Settings
One of the reasons this particular style of paper craft works so well across different situations is its versatility. Butterflies are universally recognized symbols of transformation, lightness, and beauty. They do not feel overly seasonal or tied to one specific holiday. That makes them a reliable choice for projects that need to feel thoughtful without being locked into a theme.
Think about the times you have needed a handmade card for a birthday, a thank you, or a simple note to someone going through a hard time. A flat printed card can feel impersonal. A 3D layered butterfly cardstock card, on the other hand, shows time and care. The recipient can run a finger over the layers and feel the depth. That physical experience changes how the message lands.
Beyond cards, consider home décor. A framed 3D butterfly in soft neutrals can sit on a shelf in a reading nook. A brighter version in teal or magenta can become a playful accent in a child's room. Because cardstock holds its shape well, the butterfly stays crisp and dimensional even after months of sitting on a desk or hanging on a wall.
Small Business Owners and Product Packaging
If you run a small business, you already know that packaging matters. When a customer receives an order, the unboxing experience can determine whether they take a photo and share it with their friends. Adding a small 3D layered butterfly cardstock piece inside a box or attached to a gift tag does not cost much, but it signals that you pay attention to details. That kind of care builds loyalty.
Say you sell handmade soap, candles, or jewelry. A neutral-toned butterfly tucked into the tissue paper or tied onto the ribbon makes the product feel more personal. It also gives customers something physical to remember your brand by. Unlike a printed logo, a layered paper butterfly is something people might keep on their desk or pin to a corkboard.
Where Educators and Hobbyists Find Value
Teachers and educators often look for hands-on projects that teach more than just a final product. A 3D layered butterfly cardstock activity can be used in art classes to demonstrate the concept of depth, space, and layering. It also works well in science lessons when studying symmetry or butterfly anatomy. Students get to build something with their hands while absorbing concepts that might otherwise feel abstract.
For hobbyists, this type of project is a satisfying way to spend an afternoon. It does not require expensive tools beyond a cutting machine or sharp scissors and a craft knife. The process of cutting out each layer, arranging them, and seeing the final form come together is meditative in a way that digital work rarely is. Many people find that the tactile nature of working with cardstock helps them unwind after a day of screen time.
- For the beginner: Start with a pre-designed SVG or PDF template that already has the layers separated. This removes the guesswork and lets you focus on cutting and assembly.
- For the experienced crafter: Experiment with swapping out colors, adding metallic accents, or mixing cardstock weights to create even more contrast between layers.
- For the digital creator: Use a layered butterfly file as a test project to refine your cutting machine settings before moving on to more complex multi-layer designs.
Using Layered Butterflies in Digital and Hybrid Projects
It might seem contradictory to talk about digital use for a physical paper project, but many people start with a digital file. A high-quality 3D layered butterfly cardstock template can be downloaded, adjusted in size, and cut on a machine like a Cricut or Silhouette. This bridge between digital design and physical craft is where a lot of modern creators live. You get the precision of a machine cut combined with the warmth of paper.
Bloggers and content creators often use these projects as visual anchors for tutorials or lifestyle content. A photograph of a 3D butterfly in natural light performs well on social media because it has depth and texture. If you run a craft blog, creating a step-by-step guide around a layered butterfly can attract readers who are looking for projects that look impressive but are still achievable. The combination of clear instructions and a beautiful outcome keeps people coming back.
What to Consider Before You Start
Not all cardstock is the same, and the weight of the paper you choose matters more than you might think. A standard 65 lb cardstock works well for most layers, but if you want the top layer to really pop, consider using a slightly heavier weight or adding a metallic finish. The base layer should be sturdy enough to support the structure without bending over time.
Adhesive choice also affects the final look. Thin foam squares create a consistent gap between layers, but if you want a more organic feel, you can use dots of liquid glue at different heights. Be mindful of how much space you leave between layers. Too much distance, and the butterfly starts to look disconnected. Too little, and the 3D effect gets lost.
Here are a few practical things to think about before you start cutting:
- Test your paper alignment. If you are using a cutting machine, do a quick test cut with scrap paper to make sure the blade settings match your cardstock thickness.
- Plan your color palette. A monochrome look creates a subtle, elegant effect. High contrast colors make the layers more visible from a distance.
- Consider the final use. A butterfly meant for a card can be smaller and lighter. One intended for wall art needs a sturdier base and possibly a shadow box frame.
- Store leftover layers carefully. If you cut multiple butterflies at once, keep each set together in a labeled envelope so you do not mix up the sizes.
Realistic Expectations for Time and Effort
A layered butterfly might look intricate, but the actual assembly time is often shorter than people expect. Once the pieces are cut, you can usually stack and adhere them in under fifteen minutes. The part that takes longer is getting the cuts right, especially if you are doing it by hand. If you use a cutting machine, most of the work is in the setup and material preparation.
That said, rushing the assembly can lead to crooked layers or adhesive strings showing at the edges. It helps to lay all the pieces out in order before you pick up the glue. Check the alignment from above and from the side. A small misalignment can throw off the entire shadow effect. Taking an extra minute to position each layer pays off in the finished look.
Bringing the Butterfly Into Everyday Life
One of the quietest joys of making something like a 3D layered butterfly cardstock piece is how many different places it can end up. It can sit on a mantle, tucked next to a photo frame. It can be slipped inside a book as a gift for a friend. It can become part of a wedding place setting or a baby shower decoration. Because it is made from paper, it feels personal in a way that plastic or metal decorations do not. And because it is three-dimensional, it does not get lost in the background.
If you are someone who enjoys giving handmade gifts but often runs out of time, this is a project that gives you a lot of visual impact for a relatively small investment of effort. You can cut multiple butterflies in one session and then assemble them later when you need them. Keeping a small stash of finished butterflies in a drawer means you always have something thoughtful to attach to a gift or tuck into a letter.
For the entrepreneur, marketer, or educator, this single design can become a tool for connection, a teaching moment, or a brand signature. It does not require you to be an expert paper engineer. It just asks you to be willing to stack a few pieces of paper and see what emerges. That is the beauty of a well-designed layered shape. It makes you look like you put in more effort than you actually did, and sometimes that is exactly what you need.